

Have you ever wondered how you can better manage the custom fields in your workspace? Here, I’m going to walk you through the basics of using a Custom Fields Manager, a tool I’ve found incredibly useful in organizing and tailoring my workspace to fit specific needs.
Navigating Custom Fields at a Glance
Custom fields aren’t just additional data points; they are the key to personalizing and streamlining your workflow. Let’s start by looking at an all-custom fields level. This overview gives you a bird’s eye view of all the custom fields you have. But what if you need something more specific? That’s where diving into individual folders comes in handy.
Adding and Creating Custom Fields
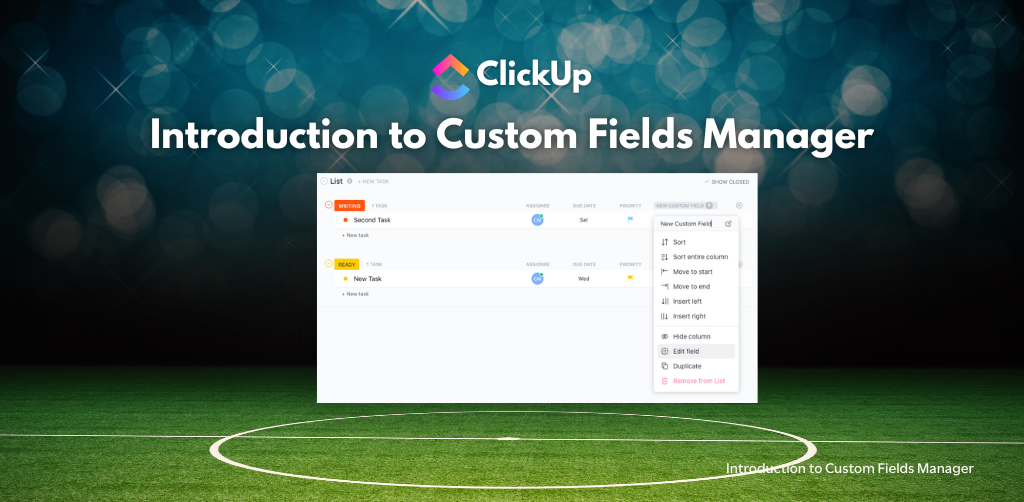
In one of my recent experiences, I navigated to a client space and a client template. Inside this template, I discovered a list with custom fields. This list had three custom fields already, but I needed something more. This is a common scenario where the Custom Fields Manager shines. It allows you to either add an existing field to your list or create a new one from scratch. The choice depends on your specific needs.

The Process of Creating a New Field
Now, let’s talk about creating a new field. It’s a straightforward process: you click the green button and follow the steps. For instance, in my project, I already had fields like ‘Recurrent Task Type’ and ‘Progress’. However, I needed an ‘External Due Date’ field. This new field would help track deadlines that are external but relevant to the project.
Ensuring Clarity and Precision
When creating a field, you also have the option to add a description. This step is optional, but it can be incredibly helpful. A clear description ensures everyone understands the purpose of the field and how to use it correctly. Remember, clarity in communication is crucial in any team environment.
Choosing the Right Field Type
Next, you’ll choose the field type. This step is where you see all the options you have for your field. It’s a crucial step because the type of field you choose determines how the data is entered and displayed. For example, a date field will present a calendar for easy selection, while a text field allows for free-form input.

Final Thoughts
Using the Custom Fields Manager is all about making your workspace work for you. It’s not just about adding fields; it’s about creating a structure that aligns with your project’s needs. Custom fields help you capture essential information in a way that standard fields might not. They provide the flexibility to adapt your workspace to different projects and requirements.
The Custom Fields Manager is a powerful tool in any project management arsenal. It allows you to tailor your workspace to fit the unique needs of each project. By adding custom fields, you’re not just collecting data; you’re creating a workspace that’s intuitive, organized, and efficient. Remember, the key to effective project management is not just in managing tasks but in managing them in a way that aligns with your specific project goals. So, why not give it a try and see how it transforms your project management experience?
Introduction to Custom Fields Manager


Be the first to comment
Leave a Reply
DFY Services
DIY TEmplates
For more, check out my services to help you streamline, systemize, and optimize your systems!

Join over 1500 others in the ClickUp for Entrepreneurs, Agencies, Marketers, & CEOs
FREE Facebook group to discuss, share, and learn about ClickUp solutions across
industries and user levels
Tips, Feedback, and Support Across Industries
Join the ClickUp Community

